There are cases wherein you would need to do mass data changes or even corrections to G/L Account master data. You can make use of the transaction code “MASS” to facilitate these changes. Another term of understanding “mass changes” is called “bulk updates”.
Note that in this example, we make use of the “Import File” functionality in the MASS transaction code in SAP S/4HANA. We will not talk about the manual entry of “from-to” in the transaction screen. Instead, we import a file and proceed with the updates. This is the approach that is recommended for massive updates. Moreover, it is a more intuitive and user-friendly option compared to manually keying in the data.
When is this used during Implementation Projects? Can you provide an example?
One application of this transaction in SAP S/4HANA implementation projects would be scenarios where there are changes that need to be made on the master data migration perspective. Let us say the General Ledger (G/L) accounts have already been loaded to one SAP S/4HANA system and they need to be updated for the other systems following latest decisions.
Of course, the ideal approach would be that the data migration template, load files, or any other migration application data origins will be corrected for the succeeding system loads. On the other hand, the system with the completed load will need these G/L Accounts to be updated via the MASS transaction code.
Main Transaction Code: MASS
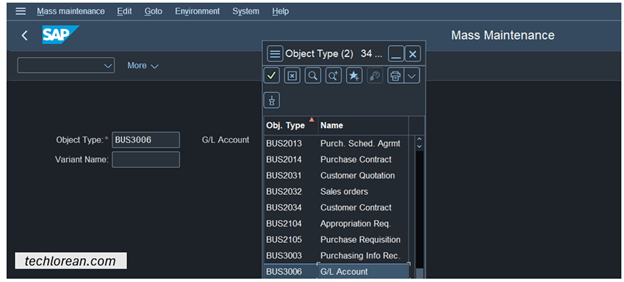
Below is a screenshot of the transaction with different object types you can use. We will continue with the discussion with an example. Consider the scenario where the Field Status Group of the GL accounts need to be updated.

Overview
- Prerequisite
- MASS Change GL Account Master Data Using Import File
- Summary of Steps
Prerequisite
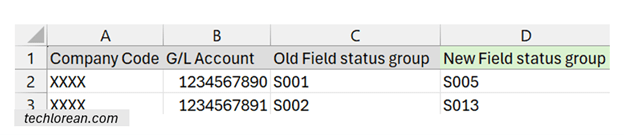
Prerequisite: I would advise you to have a file where you have G/L accounts listed with the relevant from and to changes. Example, the columns would have Company Code, G/L Account Number, Field Status Group, and NEW Field Status Group. This way, you clearly have the records that you want to update and the before & after changes.
There is no template for this upload / import file. You can simply create a spreadsheet like the screenshot I have shown below where I have the minimum columns I need to perform the update.
MASS Change GL Account Master Data Using Import File
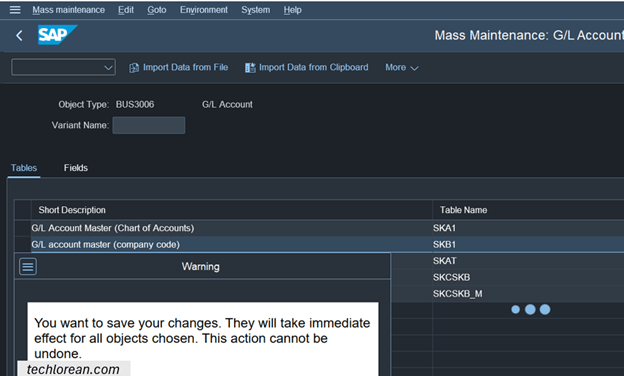
- Select the Object Type BUS3006 for the G/L Account object. You can leave the variant name blank. It is there in case variants are saved. For this example, we consider that there are no existing variants for use.
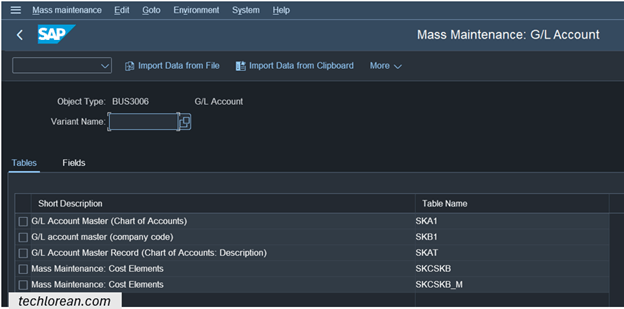
- Press Execute
- Choose the Table Name that you need the updates on. You are now presented with the screen for table selections. To make this example simple, we will only choose table SKB1 which focuses on G/L Account master data change on company code level.
Tip: you can choose multiple tables as needed. For simplicity purposes, we will use only 1 table.

- Press Execute.
- Click on Import Data from File.

- Enter the Upload Parameters then click on the Execute button.

Note: Please be patient. It will take some time for the file to be processed. Ensure that the file is not open on your desktop.
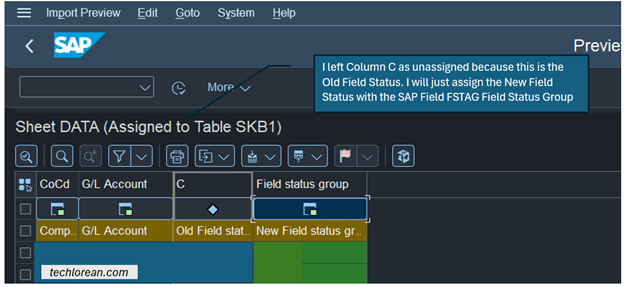
When the file is loaded, you will see the screen below with the fields you have on your Excel with Diamond symbol buttons.

- For each column, assign the SAP object counterpart. Click on the Diamond buttons and select the field from the pop-up window. In the example below, I have selected the first diamond button under Column A and selected BUKRS Company Code.

If you double click on the field name, you screen should be updated such that Column A is updated to the SAP Object/Field Name you have assigned it to.

The same approach applies to the rest of the columns except for Column C. I left Column C as unassigned because this is the Old Field Status. I will just assign the New Field Status with the SAP Field FSTAG Field Status Group.
Tip: If there are errors in any of the fields, you should see the error notifications. These need to be resolved.
- Click on the Continue button.
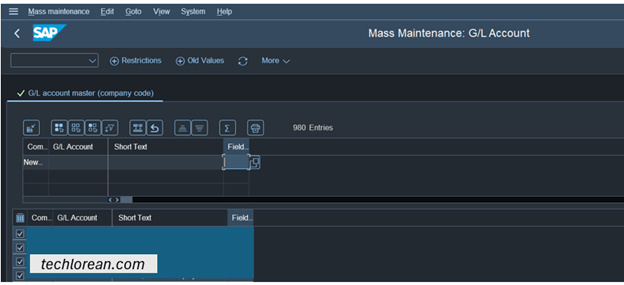
- Click on Execute to continue with the changes and review the results.
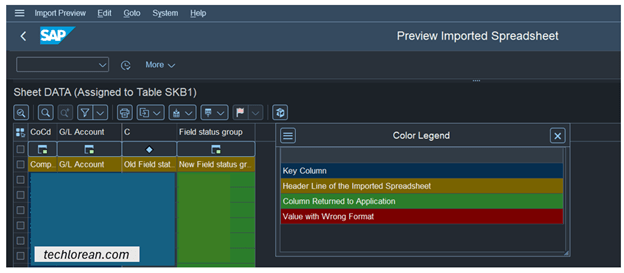
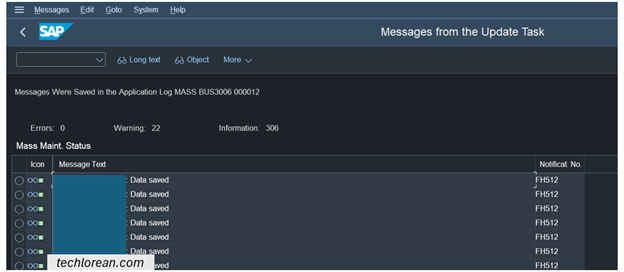
- Review the results. A summary log of the changes and any warnings or errors will be shown.
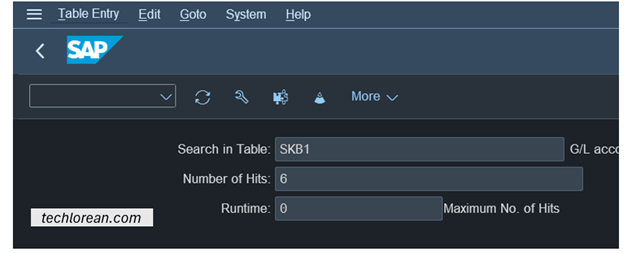
- Do a second review by doing spot checks of the successfully changed master data by viewing the table. In this example, we can check on SKB1.
- Enter random GL Accounts which we expect to be changed and see if they are accurately updated.
- Enter random GL Accounts which we DO NOT expect to be changed and see if they are still the same.
- Enter random GL Accounts which have warnings and/or errors and see if they are updated / not updated.
Summary of Steps
Prerequisite: Have a simple Excel file with the SAP Fields you need to restrict & update.
- Select the Object Type BUS3006 for the G/L Account object.
- Press Execute.
- Choose the Table Name that you need the updates on.
- Press Execute.
- Click on Import Data from File.
- Enter the Upload Parameters then click on the Execute button.
- For each column, assign the SAP object counterpart. Click on the Diamond buttons and select the field from the pop-up window.
- Click on the Continue button.
- Click on Execute to continue with the changes and review the results.
- Review the results.
- Do a second review by doing spot checks of the successfully changed master data by viewing the table.
I hope this helps. Good luck! 😊

Hello!
Are you back? So happy to hear from you again!!🙂 Thank you so much for sharing your knowledge.
LikeLike